…and yet so bored 🙁
Why am I not posting anything? I don’t know.
It’s just a simple “trick” I came across while working at my latest project.
What we are sometimes faced with when working with an API hosted on another server is something named CORS.
A really simple solution is to configure a reverse proxy (NGINX / Apache) if you have a web server (if you don’t you can easily set up a local WAMP / LAMP server for dev purposes).
And setting up a reverse proxy in NGINX is much easier than doing it in Apache as it only takes a couple of lines.
I added this to server { } in my default config (/etc/nginx/sites-available/default):
location /api/ {
    proxy_set_header Authorization "Basic ZGV2OmRldg==";
    proxy_pass http://url.to.the.api/api/;
}
The simplest proxy wouldn’t need the proxy_set_header part but in my case I needed it because there was HTTP authentication in place. “ZGV2OmRldg==” is “username:password” Base64 encoded (without quotes).
Now, accessing localhost/api/ would be the same as accessing url.to.the.api/api/, which means that if you issue a GET request to localhost you are going to get one back from localhost instead of from across the internet – bye bye CORS!
Happy developing!
Had to add an attachment functionality to the project I am currently working on at work.
The snippets below use a simple web service (which I didn’t include) that saves the files uploaded to a database and returns the columns read.
You need at least three columns in the table: ID (PK, int), FILENAME (varchar) and CONTENT (BLOB).
// Attach this method to an upload button.
private void UploadFile(object sender, RoutedEventArgs e)
{
   OpenFileDialog fileDialog = new OpenFileDialog();
   // In case you want filtering.
   fileDialog.DefaultExt = ".txt";
   fileDialog.Filter = "Text documents (.txt)|*.txt";

   bool? result = fileDialog.ShowDialog();

   if (result == true)
   {
       using (FileStream fs = new FileStream(fileDialog.FileName, FileMode.Open, FileAccess.Read))
       {
           Byte[] b = new Byte[fs.Length];
           fs.Read(b, 0, b.Length);
           fs.Close();

           try
           {
               // Save the byte array (b) to the BLOB column in the database.
               // I am using a web service.
               WebService.SaveAttachment(Path.GetFileName(fileDialog.FileName), b);
               MessageBox.Show("File uploaded!");
           }
           catch (Exception ex)
           {
               MessageBox.Show(ex.ToString());
           }
       }
   }
}
Something that bugged me for a couple of hours.
This will display the context menu (the drop down one) only when right clicking on a DataGrid row.
This presumes you want to create a transparent overlay layer over all of your elements and center a loading text to the middle of the application.
In my case I had a grid with three rows, hence the Grid.RowSpan="3".
If you change the Canvas name be sure to modify the ElementName in the DockPanel attributes.
Reference:
http://stackoverflow.com/questions/13621041/stretch-items-to-fill-canvas
Create a new project (the web service).
[WebMethod] above the method you want to use.Add a reference to the old project.
Use the Web Service.
var ws = WebServiceSoapClient();
// WebService is the class name inside your WebService.asmx file.
ws.MethodName();
Or, even better:
private WebServiceSoapClient _webServiceSoapClient;
WebServiceSoapClient WebService
{
    get
    {
        if (_webServiceSoapClient == null)
        {
            _webServiceSoapClient = new WebServiceSoapClient();
        }
        return _webServiceSoapClient;
    }
}

var something = WebService.MethodName();
If you update your Web Service remember to right click on the Service Reference and select Update Service Reference (you might need to have the server running before by viewing the asmx file in your browser).
Placeholder for something I should write about as it was really an interesting experience.
In the meantime check the project I did with Jason Chow, Clothesline.
Everything you see was coded in 3 days on a bus by me.
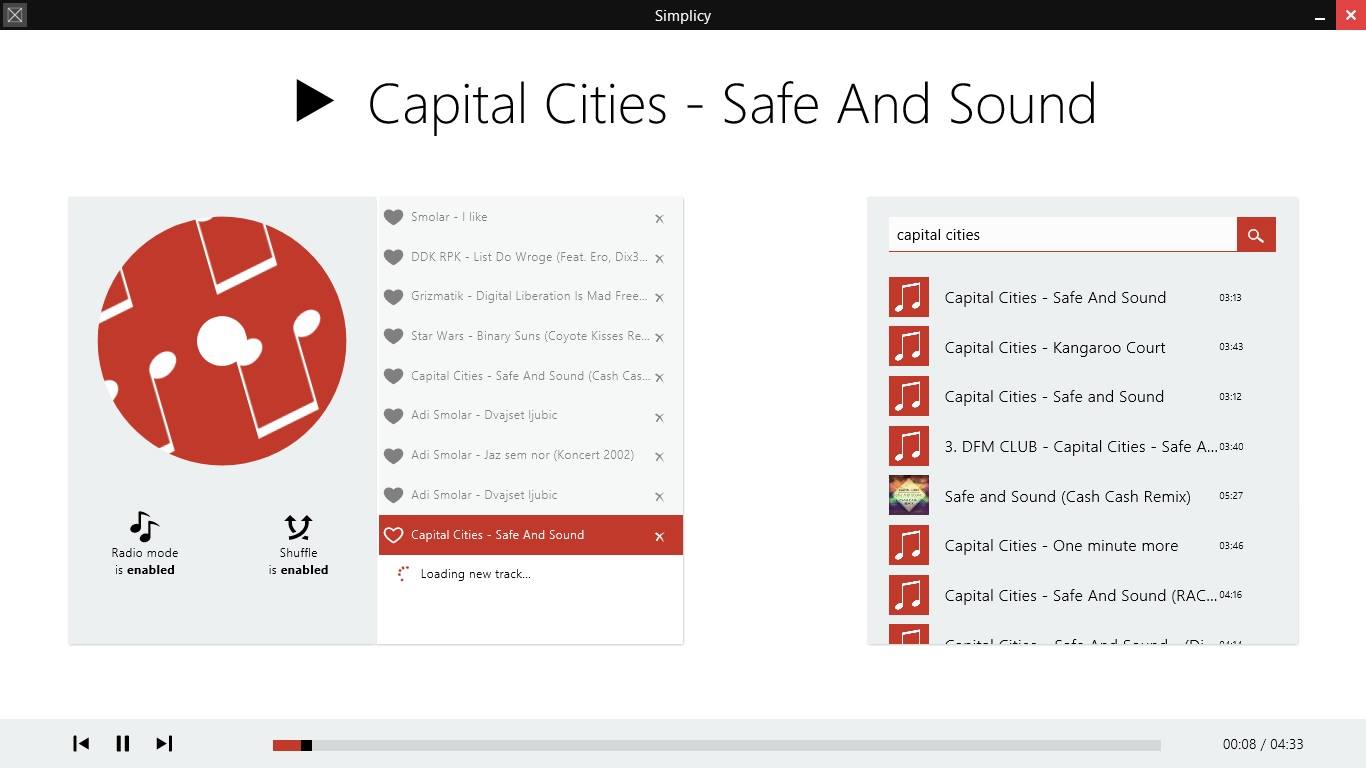
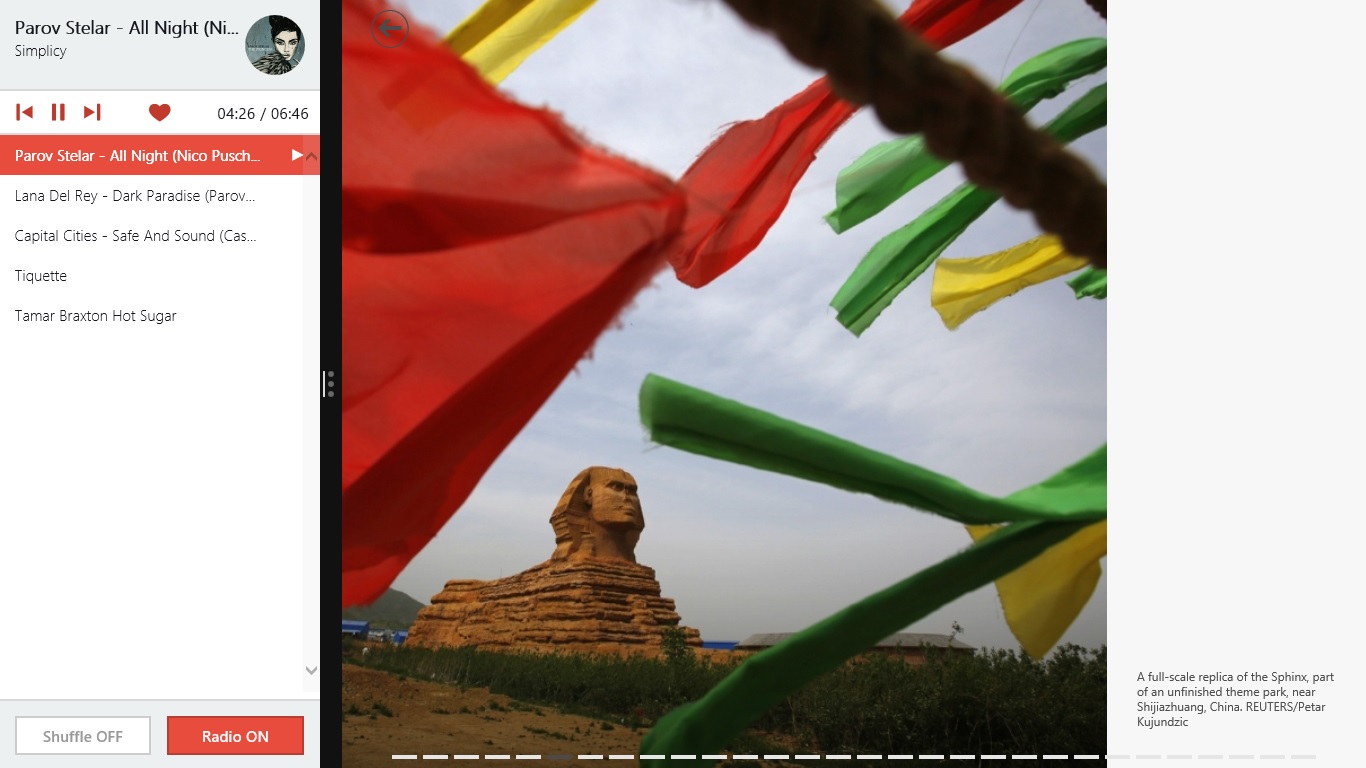
I was at Microsoft’s //publish/ event in Brežice this weekend, along with Vito and Nejc, trying to beat the competition with Vito’s application called Simplicy.
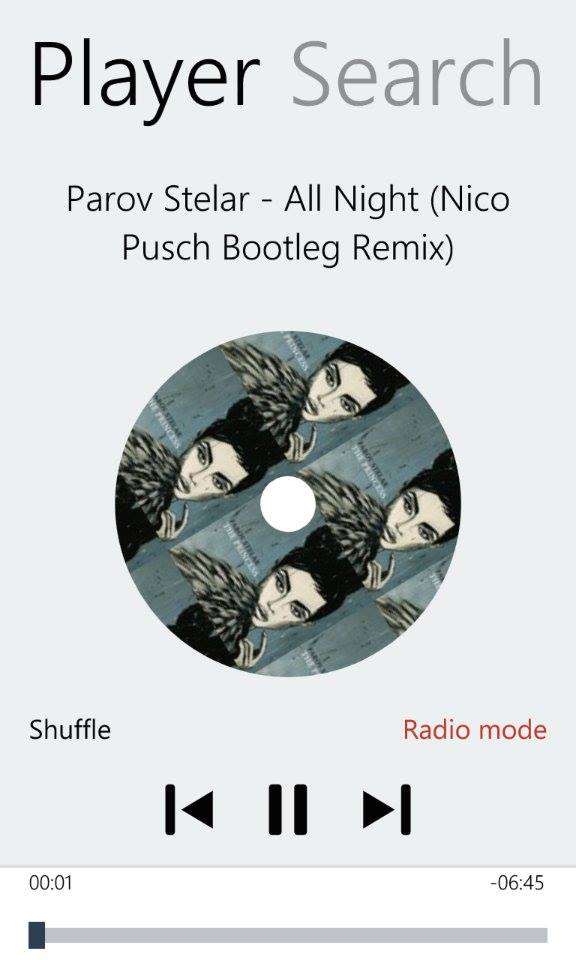
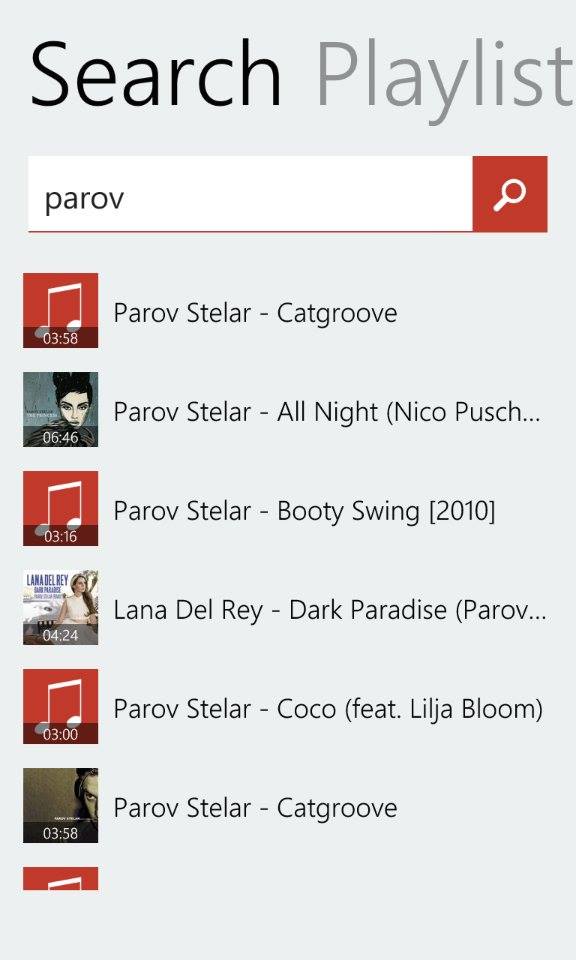
Simplicy is a simple music player (soon available for Windows 8 and Windows Phone 8), collecting music from around the net (featuring about 50 million songs) and giving users the possibility create their very own playlist with nothing but a few clicks.
You might be wondering what’s special here, right? Let me tell you.
The great thing about this application is that despite having a really simple interface there is no need to create an account or log in, to create or save your playlist. For free.
And what’s even cooler: it learns what music you like and shapes the results accordingly. You know how Windows Phone is “The Smartphone Reinvented Around You”? Simplicy is the same, but for music.
In just two days (with very little sleepy times) we managed to develop a beautiful cross-platform app and publish it to both Windows and Windows Phone stores.
And I’m really proud about the fact that we won (like bosses) in the cross-platform application category!
Screenshots!

This works with PhoneGap / Cordova applications. It should happen automatically when you configure the application to run in fullscreen mode but it doesn’t for now.
Instead of this sufficing:
<preference name="fullscreen" value="true" />
You have to include the following plugin in the config.xml file:
<gap:plugin name="org.apache.cordova.statusbar" />
And add this snippet to your index (or JavaScript) file:
document.addEventListener("deviceready", startEvents, false);
function startEvents() {
    StatusBar.hide();
}
Hope it helps!
References:
Plugin: https://github.com/apache/cordova-plugin-statusbar
PhoneGap issue (GitHub): https://github.com/phonegap/build/issues/267
I’m excited.
I can finally say what it is I do at my job: I am now one of the first Application Developers in the company I work for.
It’s nice to know where my place is and what I actually do, as until now I did whatever people threw my way (was always computer related stuff though, lately a lot of SharePoint hacking, writing functional specifications, performing tests on application updates etc).
This is also my first job as a developer. I think I’m a little scared as I never worked in a team of developers before, and always ran solo.
Let’s just hope I’ll be useful here. I’m sure I will learn a lot from the team and I’m definitely looking forward to it!
Pics later, nobody cares anyway.
I finally managed to publish my first app both to Play and AppStore (I already submitted Lokali to the Windows Phone store, so I’m now very universal)!
Swipe, the game I wrote a few words about some time ago, is finally available for free on Google Play and Apple’s App Store. Download it and tell me what you think!
And make sure to like Swipe on Facebook, where we’re going to post random Swipe facts and prepare giveaways (stuff like Doges, Swipe t-shirts, in-game swipes and more)!
Stay tuned, there are many new features coming in future updates!
Sixteen steps that will definitely save you a lot of time if you’re working with workflows, especially the more complex ones.
Saved me a lot of trouble at work, I had to clone a list along with all of it’s workflows to another site.
Saving the list as template helped me move everything (including all of the custom made forms!), while the workaround below made it possible to simply import the workflows I had in place into the new list!